最近、Google Compute Engineを触る機会があったのですが、サーバーインスタンスの作成時にrootディスクサイズを変更する方法と、SSH公開鍵を指定する方法がわかったのでまとめておきます。
※なお、この記事は2014年6月下旬時点のもので、今後Google Compute Engineの機能仕様変更があると、このとおりに動作しない可能性もありますので、ご注意ください。
準備
Google Compute Engineを使うための準備として、下記を行う必要があります。
- プロジェクトの登録(含む、支払い情報の登録)
- Google Cloud SDKのインストール
- Google Cloud SDKの認証
これらはQiitaの記事にとてもわかりやすくまとまっているので、そちらを参照しました。
ありがとうございます。
・Qiita – Google Compute Engine 入門
https://qiita.com/yuko/items/460ac35d8706e8df1290
僕の場合は、サーバー起動→Chefでベンチマーク環境を自動構築、という作業を行うことが多いので、Chef Soloの実行環境があるCentOS 6のサーバー上にGoogle Cloud SDKをインストールしました。
ひとつつまずいたのは、Google Cloud SDKの認証ところ。
認証コマンドの
$ gcloud auth login
の実行後、自動的に起動されるWebブラウザで「承認」する必要があります。
CentOS 6のCUIベースで認証コマンドを実行すると、(僕の環境では)自動的にテキストブラウザelinksが起動されるのですが、JavaScriptが無効になっているため、Googleのページでうまく「承認」できませんでした。
テキストブラウザelinksやlynxのJavaScript対応も試みましたがうまくいかなかったので、結局、GUIでFirefoxを使うためだけにXを起動し、環境変数BROWSERを指定したうえで認証コマンドを実行し、Firefoxで「承認」しました。
  $ export BROWSER="firefox"
  $ gcloud auth login
インスタンスの作成
サーバーインスタンスをGUIのGoogle Developers Consoleで作成してもよいのですが、(現時点では)作成時にGUIで指定できるオプションが少ないので、gcutilコマンドで作成することにします。
gcutilはGoogle Compute Engineを操作するコマンドラインインタフェースで、AWSでいうところのAWS CLIです。
インスタンス作成時のオプションを使って、僕が特にやりたかったことは下記の3点です。
1. rootディスクのサイズをデフォルトの10GBから増やす。
2. SSHの公開鍵は、Google Compute Engine以外でも使っているものを使用する。
3. LinuxのSSHコマンドやTeraTermなどの端末エミュレータでSSHログインする。
1.については、10GBではそもそも容量として心細いですし、ディスク性能はディスク容量に比例します。
かといって別ボリュームを追加するのは管理が面倒になるので、rootディスクのサイズを最初から増やしたいのですが、Google Developers Consoleではできません。
2.は、AWSなどほかのクラウドサービスでも使っている鍵ペアを使用したいため。
とくに、僕はいろいろなクラウドサービスのベンチマークをとるためにChef Soloを使って環境を準備することが多いので、ほかのサービスと同じOSユーザーと鍵ペアを使って、手順を共通化したいのです。
(2014.7.10追記)
SSH鍵は、GUIでのインスタンス作成時も指定できることがわかりました。
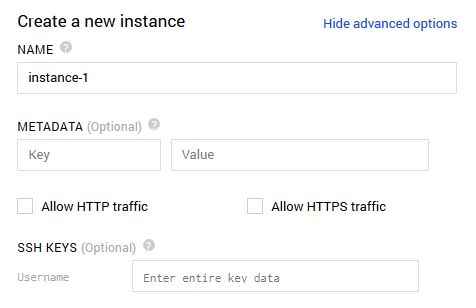
GCEインスタンス作成時のSSH鍵指定
(2014.7.10追記ここまで)
3.は、SSHログインするのに、いちいちgcutilコマンドを使わなきゃならないのは面倒ですよね。
gcutil addinstanceコマンドでインスタンスを作成
gcutil addinstanceコマンドを使用してインスタンスを作成します。
gcutil addinstanceのオプションはGoogleのドキュメントを参照してください。
・Google Comupte Engine, Instance Commands
https://developers.google.com/compute/docs/gcutil/reference/instance
  $ gcutil --project=<プロジェクト名> addinstance <インスタンス名> \
    --zone=<ゾーン名> \
    --machine_type=<マシンタイプ> \
    --image=<OSイメージタイプ> \
    --auto_delete_boot_disk \
    --boot_disk_size_gb=<rootディスクのサイズ> \
    --authorized_ssh_keys=<ユーザー名>:<公開鍵ファイルのパス>
ここで、<インスタンス名>は、Google Compute Engineで表示されるインスタンス名で、また、作成したサーバーではhostnameとしてセットされます。
<ユーザー名>は、作成したサーバーでuseraddされる初期ユーザー名です。
<公開鍵ファイルのパス>は、gcutilコマンドを実行しているOS上にある、作成するサーバーにアップロードしたい公開鍵のパスを指定します。
また、この公開鍵は、作成したサーバーで、~<ユーザー名>/.ssh/authorized_keys にセットされます。
※サーバーのホスト名がセットされるのと、任意の初期ユーザー名を指定できるのはAWS EC2にはない機能だと思うので地味にうれしいですね。(AWS CLIからだとできるのかな?)
以下、us-central1-aゾーンに、マシンタイプn1-standard-1のCentOS 6、ディスクサイズ15GB、インスタンス名(ホスト名)gce-n1standardのサーバーを作成する例です。
 $ gcutil --project=inaba-test-proj addinstance gce-n1standard \
    --zone=us-central1-a \
    --machine_type=n1-standard-1 \
    --image=centos-6 \
    --auto_delete_boot_disk \
    --boot_disk_size_gb=15 \
    --authorized_ssh_keys=user1:/path/to/private_key_file
なお、プロジェクトで初めてインスタンスを作成するときは、デフォルトの鍵ペア生成を求められます。
ただし、今回は、–authorized_ssh_keysオプションで公開鍵を指定しているので、ここで作成するGoogle Compute Engineの鍵ペアは、作成するサーバーには使用されません。
WARNING: You don't have an ssh key for Google Compute Engine. Creating one now...
Enter passphrase (empty for no passphrase):
Enter same passphrase again:

INFO: Waiting for insert of instance gce-n1standard. Sleeping for 3s.
...
以下のような出力があり、だいたい20秒程度でインスタンスが作成されました。
external-ipのところに、サーバーのグローバルIPアドレスが表示されています。
(WARNINGについては後で説明します。)
WARNING: DISK_SIZE_LARGER_THAN_IMAGE_SIZE: Disk size: '15 GB' is larger than
image size: '10 GB'. The primary root persistent disk partition size will be
equal to the image size. The disk needs to be re-partitioned from
within an instance before the additional space can be used.

Table of resources:

+----------------+---------------+---------------+---------------+---------+
| name           | network-ip    | external-ip   | zone          | status  |
+----------------+---------------+---------------+---------------+---------+
| gce-n1standard | 10.240.xxx.xx | xxx.xx.xx.xxx | us-central1-a | RUNNING |
+----------------+---------------+---------------+---------------+---------+

Table of operations:

+---------------------------------------------------------+--------+-------------------------------+----------------+
| name                                                    | status | insert-time                   | operation-type |
+---------------------------------------------------------+--------+-------------------------------+----------------+
| operation-1403502695321-4fc7a6f988da8-1d927545-xxxxxxxx | DONE   | 2014-06-22T22:51:35.757-07:00 | insert         |
+---------------------------------------------------------+--------+-------------------------------+----------------+
gcutil sshコマンドでSSHログインしてみます。
–private_key_fileオプションで、サーバーにアップロードした公開鍵とペアの秘密鍵のパスを指定します。
 $ gcutil --project=inaba-test-proj ssh \
    --ssh_user=user1 \
    --private_key_file=/path/to/private_key_file \
    <インスタンス名>

INFO: Zone for gce-n1standard detected as us-central1-a.
INFO: Running command line: ssh -o UserKnownHostsFile=/dev/null -o CheckHostIP=no -o StrictHostKeyChecking=no -i /path/to/private_key_file -A -p 22 user1@<IP Address> --
Warning: Permanently added 'xxx.xx.xx.xxx' (RSA) to the list of known hosts.
「sshコマンドでもログインできるよ。」と教えてくれるので試してみます。
 $ ssh -o UserKnownHostsFile=/dev/null -o CheckHostIP=no \
    -o StrictHostKeyChecking=no \
    -i /path/to/private_key_file \
    -A -p 22 user1@<IP Address>
オプションを除いて、下記のように簡略化してもログインできます。
$ ssh -i /path/to/private_key_file user1@<IP Address>
TeraTerm等の端末エミュレーターでも、サーバーのIPアドレス、ユーザー名、秘密鍵と秘密鍵のパスフレーズを入力すれば、SSHログインできます。
これで、SSHログインが確認できました。
パーティションサイズの変更
インスタンス作成時に下記のメッセージが表示されました。
WARNING: DISK_SIZE_LARGER_THAN_IMAGE_SIZE: Disk size: '15 GB' is larger than
image size: '10 GB'. The primary root persistent disk partition size will be
equal to the image size. The disk needs to be re-partitioned from
within an instance before the additional space can be used.
「ディスクサイズを15GBとしたけど、イメージサイズは10GBなので、再パーティションが必要ですよ。」と言われています。
そのままではせっかく増やしたディスク領域を使用できないので、対応します。
この対応手順はGoogleドキュメントに記載されています。
・Google Compute Engine, Disks
Repartitioning a root persistent disk
https://developers.google.com/compute/docs/disks?hl=en#repartitionrootpd
大まかには、
作成したサーバーにSSHログインし
→fdiskコマンドでパーティションを切り直し
→OSを再起動して
→resize2fsでファイルシステムに反映します。
以下、実際にやってみます。
まず、作成したサーバーにSSHログインします。
ログイン、rootユーザーにスイッチ後、dfコマンドで確認します。
デフォルトの10GBしか見えていません。
 # df -Th

Filesystem      Size  Used Avail Use% Mounted on
/dev/sda1       9.9G  1.1G  8.3G  12% /
tmpfs           1.8G     0  1.8G   0% /dev/shm
fdisk -lで確認すると、/dev/sdaは、16.1GB見えていることがわかります。
 # fdisk -l /dev/sda

Disk /dev/sda: 16.1 GB, 16106127360 bytes
4 heads, 32 sectors/track, 245760 cylinders
Units = cylinders of 128 * 512 = 65536 bytes
Sector size (logical/physical): 512 bytes / 4096 bytes
I/O size (minimum/optimal): 4096 bytes / 4096 bytes
Disk identifier: 0x0004e34f

   Device Boot      Start         End      Blocks   Id  System
/dev/sda1              17      163825    10483712+  83  Linux
fdiskコマンドでパーティションを切り直します。
 # fdisk /dev/sda

The device presents a logical sector size that is smaller than
the physical sector size. Aligning to a physical sector (or optimal
I/O) size boundary is recommended, or performance may be impacted.

WARNING: DOS-compatible mode is deprecated. It's strongly recommended to
         switch off the mode (command 'c') and change display units to
         sectors (command 'u').
WARNINGメッセージに従って、DOS-compatibleモードとサイズの表示、入力単位を変更します。
Command (m for help): c //★DOS-compatibleモードをOFFにする
DOS Compatibility flag is not set

Command (m for help): u //★サイズの表示、入力単位をセクターに変更
Changing display/entry units to sectors
パーティション情報を確認します。
Command (m for help): p //★パーティション情報の確認

Disk /dev/sda: 16.1 GB, 16106127360 bytes
4 heads, 32 sectors/track, 245760 cylinders, total 31457280 sectors
Units = sectors of 1 * 512 = 512 bytes
Sector size (logical/physical): 512 bytes / 4096 bytes
I/O size (minimum/optimal): 4096 bytes / 4096 bytes
Disk identifier: 0x0004e34f

   Device Boot      Start         End      Blocks   Id  System
/dev/sda1            2048    20969472    10483712+  83  Linux
パーティションを切り直すため、いったんパーティション/dev/sda1を削除します。
Command (m for help): d //★パーティションを削除
Selected partition 1
再度パーティション情報を確認します。
削除したので、パーティション/dev/sda1が表示されていた箇所が空になっています。
Command (m for help): p //★パーティション情報の確認

Disk /dev/sda: 16.1 GB, 16106127360 bytes
4 heads, 32 sectors/track, 245760 cylinders, total 31457280 sectors
Units = sectors of 1 * 512 = 512 bytes
Sector size (logical/physical): 512 bytes / 4096 bytes
I/O size (minimum/optimal): 4096 bytes / 4096 bytes
Disk identifier: 0x0004e34f

   Device Boot      Start         End      Blocks   Id  System
新しいパーティションを作成します。
セクターの指定はデフォルトのままで問題ないので、そのままEnterします。
Command (m for help): n //★パーティションを作成
Command action
   e   extended
   p   primary partition (1-4)
p //★プライマリパーティションを作成
Partition number (1-4): 1 //★パーティション番号は1
First sector (2048-31457279, default 2048): //★セクターの開始位置はデフォルトまま
Using default value 2048
Last sector, +sectors or +size{K,M,G} (2048-31457279, default 31457279): //★終端のセクターの終了位置はデフォルトまま
Using default value 31457279
新しいパーティション/dev/sda1が作成され、Idが83(Linuxパーティションタイプ)と、パーティションを切り直す前と同じであることを確認します。
Command (m for help): p //★パーティション情報の確認

Disk /dev/sda: 16.1 GB, 16106127360 bytes
4 heads, 32 sectors/track, 245760 cylinders, total 31457280 sectors
Units = sectors of 1 * 512 = 512 bytes
Sector size (logical/physical): 512 bytes / 4096 bytes
I/O size (minimum/optimal): 4096 bytes / 4096 bytes
Disk identifier: 0x0004e34f

   Device Boot      Start         End      Blocks   Id  System
/dev/sda1            2048    31457279    15727616   83  Linux
パーティション情報を保存します。
Command (m for help): w //★パーティション情報の書き込み
The partition table has been altered!

Calling ioctl() to re-read partition table.

WARNING: Re-reading the partition table failed with error 16: Device or resource busy.
The kernel still uses the old table. The new table will be used at
the next reboot or after you run partprobe(8) or kpartx(8)
Syncing disks.
wでパーティション情報を書き込むと、自動的にfdiskコマンドから抜けます。
新しいパーティション情報を読み込ませるため、OSを再起動します。
# shutdown -r now
OS起動後、SSHログインしてdfコマンドでディスク情報を確認します。
 # df -h

Filesystem      Size  Used Avail Use% Mounted on
/dev/sda1       9.9G  1.1G  8.3G  12% /
tmpfs           1.8G     0  1.8G   0% /dev/shm
まだ10GBしか見えていませんね。
resize2fsコマンドでファイルシステムのサイズを変更します。
 # resize2fs /dev/sda1

Filesystem at /dev/sda1 is mounted on /; on-line resizing required
old desc_blocks = 1, new_desc_blocks = 1
Performing an on-line resize of /dev/sda1 to 3931904 (4k) blocks.
The filesystem on /dev/sda1 is now 3931904 blocks long.
再度dfコマンドで確認します。
 # df -Th

Filesystem     Type   Size  Used Avail Use% Mounted on
/dev/sda1      ext4    15G  1.1G   13G   8% /
tmpfs          tmpfs  1.8G     0  1.8G   0% /dev/shm
インスタンス作成時に指定したとおり、15GBとなりました!
※AWS EC2では、以前はresize2fsコマンドの実行のみ必要でしたが、現在はそれすら不要で最初から起動時に指定したディスクサイズが認識されていますね。fdiskコマンドの操作は手間なので、Google Compute Engineのほうも早くそうなるとよいのですが。
補足:Google Compute Engineインスタンスのディスクについて
GCEインスタンスのディスクですが、英語ドキュメントでは、「Compute Engine offers Persistent Disk resources as the primary storage for your virtual machine instances.」と記載されています。
「Persistent Disk(永続ディスク、AWSでいうところのEBS)」というネットワークストレージがデフォルトです。
日本語ドキュメントは古いので、「デフォルトはエフェメラルディスク」となっています。
・Google Compute Engine Disks(英語)
https://developers.google.com/compute/docs/disks?hl=en
・Google Compute Engine ディスク(日本語)→古い
https://developers.google.com/compute/docs/disks?hl=ja
AWSのようにエフェメラルディスクを追加する方法はないのだろうか、と思ったのですが、ドキュメントからは見つけられませんでした。
永続ディスクの性能についてもドキュメントがあり、ディスクサイズを大きくすることで性能がアップすると書かれています。
・Compute Engine Disks: Price, Performance, and Persistence
https://cloud.google.com/compute/docs/disks/performance?hl=en
永続ディスクのSSD版はLimited Previewとのことで、リクエストフォームから申請すれば、使えるようになるそうです。
https://developers.google.com/compute/docs/disks?hl=en#typeofdisks
まとめ
Google Compute Engineで、インスタンス作成時にrootディスクサイズを変更し、SSHの公開鍵を指定する手順をまとめました。
IaaS業界では、先行するAWSに対してMicrosoft AzureとGoogle Compute Engineがすごい勢いで機能追加を行って追従しています。
日本でもGoogle Compute Engineの利用が増えていくと思われますので、ファイアウォールやロードバランサーなどの機能も調査していきます。